How to create a multiple module project using Maven
Used software
This tutorial considers the following software and environment:
- Ubuntu 12.04
- Maven 3.0.4
- Eclipse Juno (for additional tutorial steps)
Creating the main project
In this tutorial we will assume that we want to create a Maven project made by two distinct modules: One will be a web application (WAR) and the other will be a library (JAR). The library project will be referenced by the web application project so it will be included by Maven in the WEB-INF/lib directory.
We start by positioning ourselves in the workspace directory and creating the main (or parent project) by issuing the following Maven command:
After this step you will end up with a directory called com-byteslounge-main that will contain your main project.
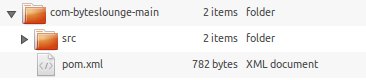
Now you may delete the src folder since it will not be used. After this edit your pom.xml file and change
Note that you just changed the packaging type of the main project from jar to pom. After this your pom.xml file should look like the following:
<?xml version="1.0"?>
<project xmlns="http://maven.apache.org/POM/4.0.0"
  xmlns:xsi="http://www.w3.org/2001/XMLSchema-instance"
  xsi:schemaLocation="http://maven.apache.org/POM/4.0.0
  http://maven.apache.org/xsd/maven-4.0.0.xsd">
  <modelVersion>4.0.0</modelVersion>

  <groupId>com.byteslounge.main</groupId>
  <artifactId>com-byteslounge-main</artifactId>
  <version>1.0-SNAPSHOT</version>
  <packaging>pom</packaging>

  <name>com-byteslounge-main</name>
  <url>http://maven.apache.org</url>

  <!-- ommiting other sections for clarity -->

</project>
Creating the project modules
After creating the main project we will create the library module (or project). Place yourself in the main project directory and issue the following Maven command:
The library project will be created in the directory com-byteslounge-lib.
Now we create the WAR module by issuing the following command:
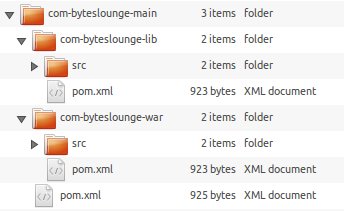
The WAR module will be created in the directory com-byteslounge-war. At this moment you have two directory projects inside the main project directory each one containing its own pom.xml file:
Now we must edit the pom.xml file of the WAR project and do a couple of things: The first one is to define the module packaging type as war, ie adding
<?xml version="1.0"?>
<project xsi:schemaLocation="http://maven.apache.org/POM/4.0.0
  http://maven.apache.org/xsd/maven-4.0.0.xsd"
  xmlns="http://maven.apache.org/POM/4.0.0"
  xmlns:xsi="http://www.w3.org/2001/XMLSchema-instance">
  <modelVersion>4.0.0</modelVersion>
  <parent>
    <groupId>com.byteslounge.main</groupId>
    <artifactId>com-byteslounge-main</artifactId>
    <version>1.0-SNAPSHOT</version>
  </parent>
  <groupId>com.byteslounge.war</groupId>
  <artifactId>com-byteslounge-war</artifactId>

  <!-- packaging defined as war -->
  <packaging>war</packaging>

  <version>1.0-SNAPSHOT</version>
  <name>com-byteslounge-war</name>
  <url>http://maven.apache.org</url>
  <properties>
    <project.build.sourceEncoding>UTF-8</project.build.sourceEncoding>
  </properties>
  <dependencies>

    <!-- dependency to lib project -->
    <dependency>
      <groupId>com.byteslounge.lib</groupId>
      <artifactId>com-byteslounge-lib</artifactId>
      <version>1.0-SNAPSHOT</version>
    </dependency>

    <!-- other dependencies omitted for clarity -->

  </dependencies>
</project>
Now you must create a web.xml file. For the clarity of this example we will create an empty one. Create a file called web.xml in the war module:
com-byteslounge-war/src/main/webapp/WEB-INF/web.xmlAs a final step we must move to the main project directory and issue the build command:
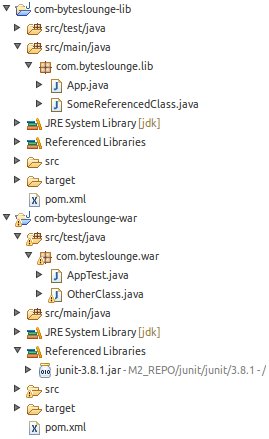
At this point you have a multiple module Maven project. You can start defining classes in your library project and referencing them from your war project classes. You may add as many modules you want to your main Maven project using this approach.
Importing the multiple Maven project in Eclipse
To import the project you just created in Eclipse you just have to place yourself in the main project directory and issue the following command:
After this step you should open Eclipse and set M2_REPO classpath variable: Window -> Preferences -> Java -> Classpath variables. Create a new variable named M2_REPO and point it to your local Maven repository folder under .m2, ie /home/user/.m2/repository/
Finally you just need to Import the project into the workspace by using the Import Existing Projects into Workspace feature from Eclipse, selecting your Maven main project directory as the Import root directory and finally select both projects from the Import window.
The source code from this example is available for download right at the bottom of the tutorial.