How to connect to an Android server socket in the emulator
Introduction
This tutorial will not focus on how to create Android activities or applications from scratch. It will assume that you already have a basic understanding about Android application development and will jump straight into the server sockets running in the emulator example.
Used software:
- Ubuntu 12.04
- Eclipse Juno
- Android SDK 21.0.0
A simple Android server
Let's create a very simple activity that opens a server socket and listens for incoming connections:
package com.byteslounge.android.server;

import pt.webprods.android.file.manager.R;
import android.app.Activity;
import android.os.Bundle;

public class HomeActivity extends Activity {

  @Override
  public void onCreate(Bundle savedInstanceState) {
    super.onCreate(savedInstanceState);
    setContentView(R.layout.home_activity);
    new ServerThread().start();
  }

}
This activity is basically launching a separate thread that will listen for incoming connections.
The thread class looks like the following:
package com.byteslounge.android.server;

import java.io.BufferedReader;
import java.io.InputStreamReader;
import java.io.PrintWriter;
import java.net.Inet4Address;
import java.net.Inet6Address;
import java.net.InetAddress;
import java.net.NetworkInterface;
import java.net.ServerSocket;
import java.net.Socket;
import java.util.Enumeration;

public class ServerThread extends Thread {

  private ServerSocket serverSocket;
  private Socket clientSocket;
  private PrintWriter out;
  private BufferedReader in;

  public void run(){

    try{
      // Open a server socket listening on port 8080
      InetAddress addr = InetAddress.getByName(getLocalIpAddress());
      serverSocket = new ServerSocket(8080, 0, addr);
      clientSocket = serverSocket.accept();

      // Client established connection.
      // Create input and output streams
      in = new BufferedReader(
             new InputStreamReader(clientSocket.getInputStream()));
      out = new PrintWriter(clientSocket.getOutputStream(), true);

      // Read received data and echo it back
      String input = in.readLine();
      out.println("received: " + input);

      // Perform cleanup
      in.close();
      out.close();

    } catch(Exception e) {
      // Omitting exception handling for clarity
    }
  }

  private String getLocalIpAddress() throws Exception {
    String resultIpv6 = "";
    String resultIpv4 = "";

      for (Enumeration en = NetworkInterface.getNetworkInterfaces();
        en.hasMoreElements();) {

        NetworkInterface intf = en.nextElement();
        for (Enumeration enumIpAddr = intf.getInetAddresses();
            enumIpAddr.hasMoreElements();) {

            InetAddress inetAddress = enumIpAddr.nextElement();
            if(!inetAddress.isLoopbackAddress()){
              if (inetAddress instanceof Inet4Address) {
                resultIpv4 = inetAddress.getHostAddress().toString();
                } else if (inetAddress instanceof Inet6Address) {
                  resultIpv6 = inetAddress.getHostAddress().toString();
                }
            }
        }
    }
    return ((resultIpv4.length() > 0) ? resultIpv4 : resultIpv6);
  }
}
Launching and testing
By now you should launch your application in the emulator. When it shows us up note the port in the upper left corner:

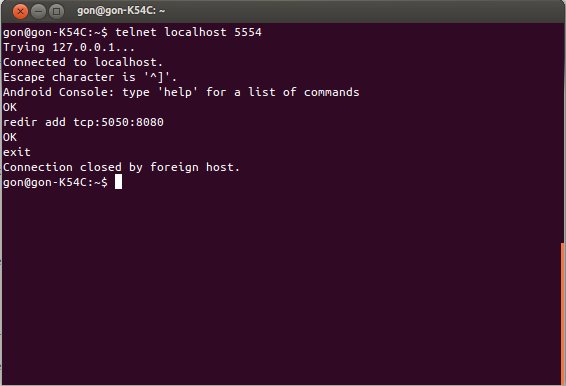
Connect to the emulator issuing the following telnet command using the emulator port:
Now you have an open session connected to the emulator. Remember we created the server socket listening on port 8080? Let's add a redirection rule that redirects connections from an arbitrary port - let's say 5050 - to our server socket port. Issue the following command:
Now you can type exit to leave the emulator session. If everything went OK it should look like the following:
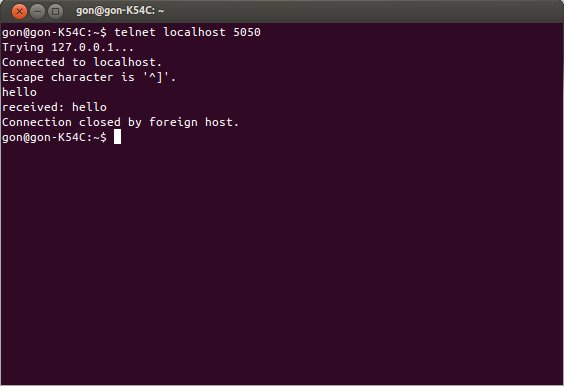
We are now ready to connect to our server socket and test it. Now issue the following command:
A connection to your Android server socket will be established. Now when you enter some random message into the console you will receive the echo from the server:
That's it. You can now test your Android server applications in the emulator without needing a real device.