How to create a simple Maven project
Used software
This tutorial considers the following software and environment:
- Ubuntu 12.04
- Maven 3.0.4
- Eclipse Juno (for additional tutorial steps)
Creating the project
After you download Maven from Apache website and extract it to your local file system it is advisable that you add Maven bin folder to your system path. This way you may execute Maven commands from anywhere within your file system.
Place yourself in the directory where you want to create your Maven project and execute the following command:
After this step you will end up with a new directory containing your new Maven project, in this case com-byteslounge directory. Inside this directory there will be other directories that constitute the usual Maven project structure. Please note the pom.xml file. This is where you configure your project dependencies to external libraries that will be downloaded and included in your project by Maven.

There is also a default App.java class. You can delete this file if you don't need it as it's jut a sample class created by Maven. Now you can create your project packages and class files inside com-byteslounge/src/main directory as you would do in a regular Java project. Every time you wish to build your Maven project just issue the following command:
Importing your Maven project into Eclipse
If you wish to import your Maven project into eclipse you should place yourself in the project directory and issue the following command:
After this step you should open Eclipse and set M2_REPO classpath variable: Window -> Preferences -> Java -> Classpath variables. Create a new variable named M2_REPO and point it to your local Maven repository folder under .m2, ie /home/user/.m2/repository/
Finally you just need to Import the project into the workspace by using the Import Existing Projects into Workspace feature from Eclipse and selecting your Maven project directory as the Import root directory.
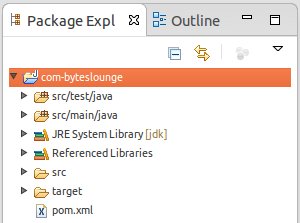
Every time you include new dependencies in your pom.xml file you should issue the command mvn eclipse:eclipse again so the references get updated in your Eclipse project. We will see how to include Maven dependencies into your project in another tutorial.